
The menu widget lays out a list of items with prices, joined by dotted leaders, like a café menu. Each item can have a short description underneath.
You'll need: the editor role or higher.
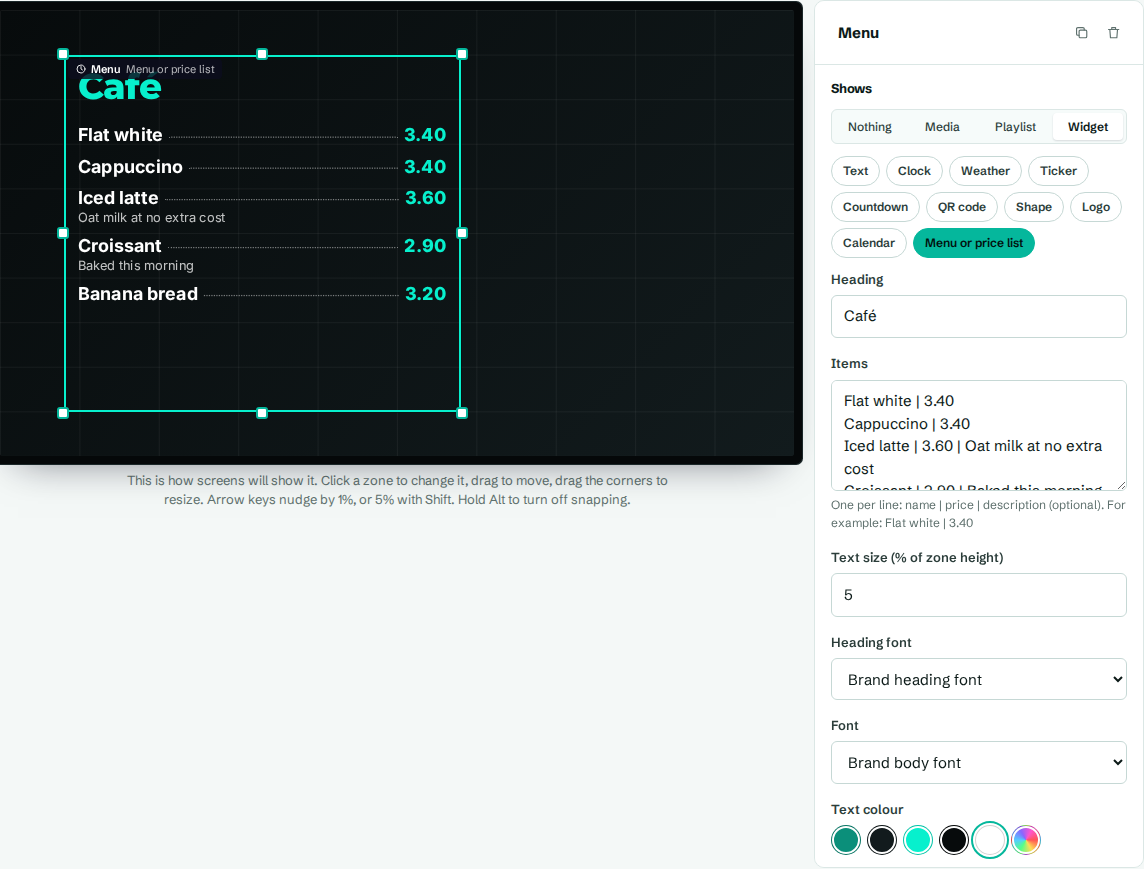
Add a menu
- In the designer, select a zone.
- Under Shows, choose Widget, then Menu or price list.
- Type a Heading and your Items.
- Select Save layout.
The Café menu and Price board templates in Menus and prices use this widget.
Write the items
Put one item per line, with parts separated by a vertical bar |:
name | price | description (optional)For example:
Flat white | 3.40
Cappuccino | 3.80
Croissant | 2.90 | Butter, baked this morning
Avocado toast | 7.50 | Sourdough, chilli, lime
Type the currency symbol if you want one, such as £3.40. Empty lines are skipped.
Settings
| Setting | What it does |
|---|---|
| Heading | A title above the list, like "Coffee" or "Breakfast". Leave blank for none. |
| Items | The list, one per line: name, price and optional description, separated by vertical bars. |
| Text size (% of zone height) | Size of the item text, from 1 to 30. 5 is the default. Long lists shrink to fit the zone. |
| Heading font | Font for the heading. Starts as your brand heading font. |
| Font | Font for the items. Starts as your brand body font. |
| Text colour | Colour of item names and descriptions. |
| Heading and price colour | Colour of the heading and prices. Starts as your brand accent colour. |
Change the menu by time of day
Make a separate layout for each menu, such as "Breakfast menu" and "Lunch menu", and use schedules to switch between them. See Create a schedule.